Dot Gradients: Bullet Journal Setup
 * All supplies used to setup these spreads are linked at the bottom of the page.
A new month is here and I am off to my Pinterest boards to find inspiration for my next bullet journal theme! The inspiration for this month’s theme was from the modern artist Marcius Galan.
In one of his pieces (linked here), he used red pins on wooden boards to create interesting patterns and gradients. By changing the density of the pins, the result looks dynamic and organic. Once I saw it, I knew I wanted to try something similar for my July theme.
Cover Page
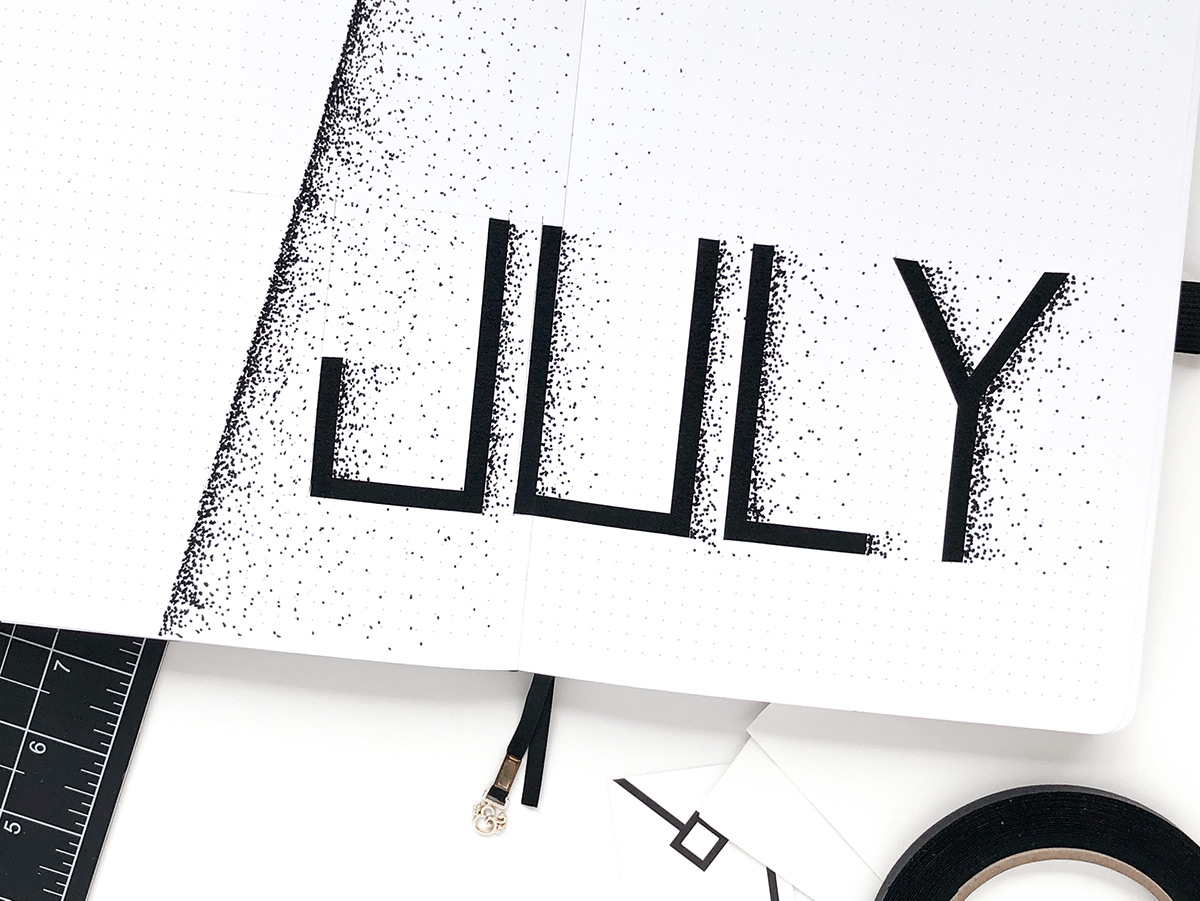
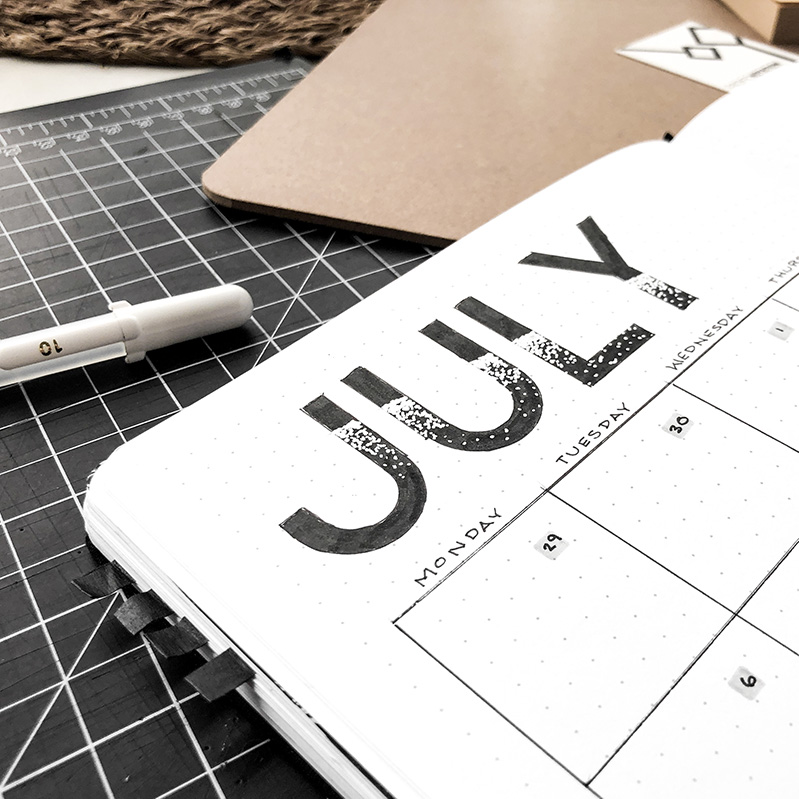
To start the cover, I used the thin black masking tape from my Etsy shop to write out “July”. This is a quick way to get bold lettering in a minimalist style, and it gives my pens a little break! Using an Xacto knife to trim the ends of the tape, I was able to get nice crisp edges.
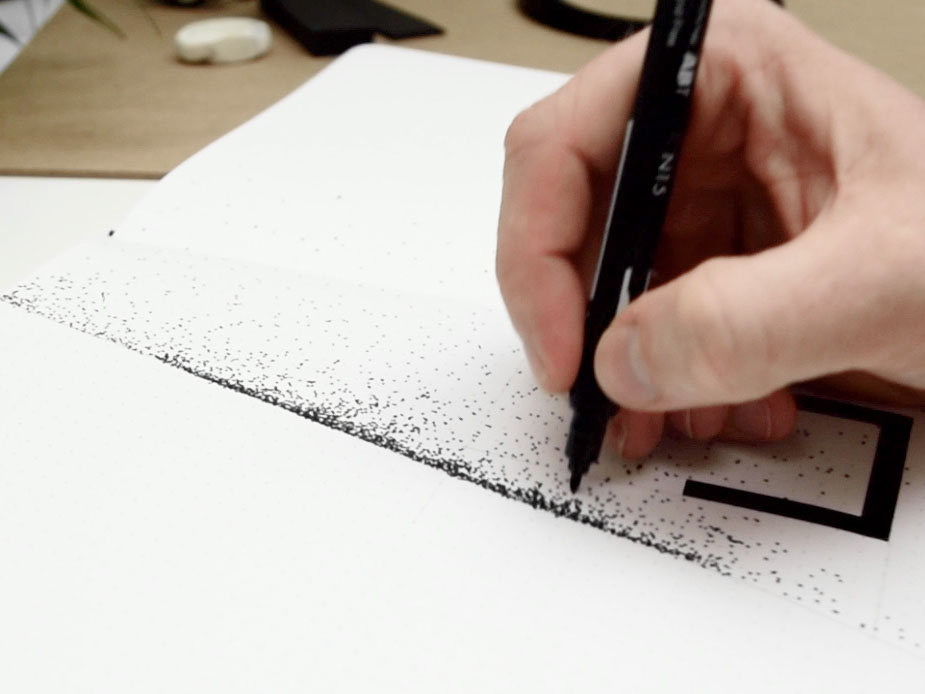
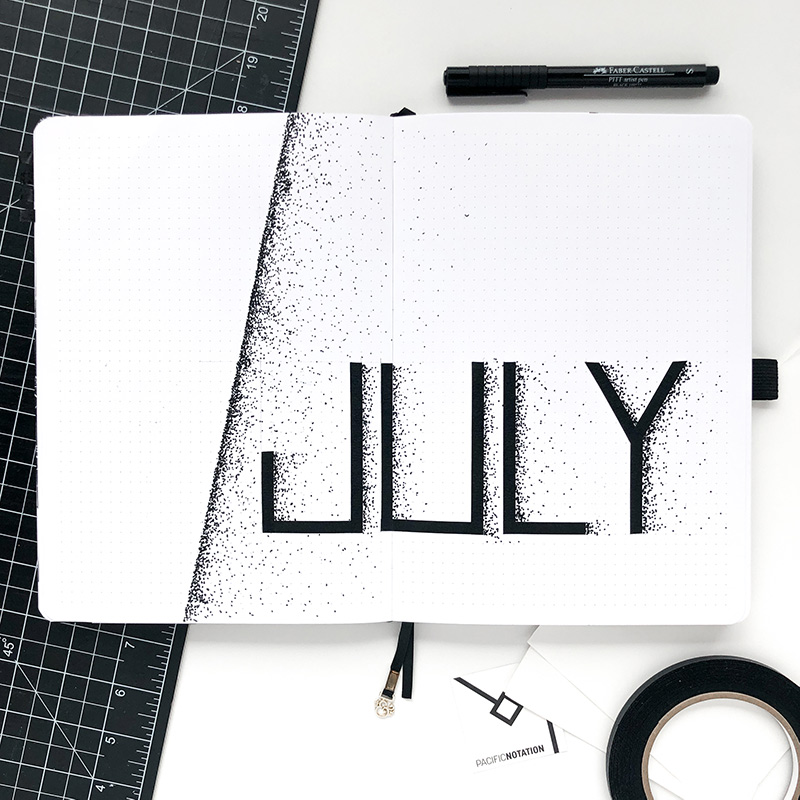
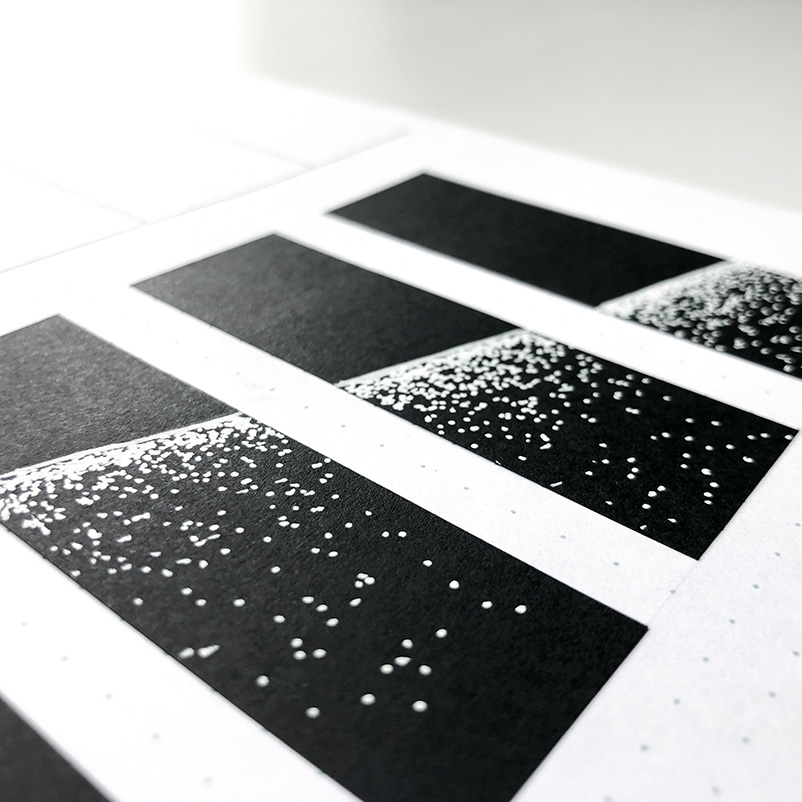
Once the month title was in place, I moved on to making the dot gradients. I started by penciling in a diagonal line and then filling in dots with a black Tombow pen to the right of this line. The closer to the line, the more dots I used to make the final appearance darker and denser. I love how the result ends up looking like a shadow on the page.
I also added dot gradients to the letters to fit in with the rest of the aesthetic. At this point I was getting some strong Avengers: Infinity War vibes with the letters “turning to dust”.
Monthly Calendar
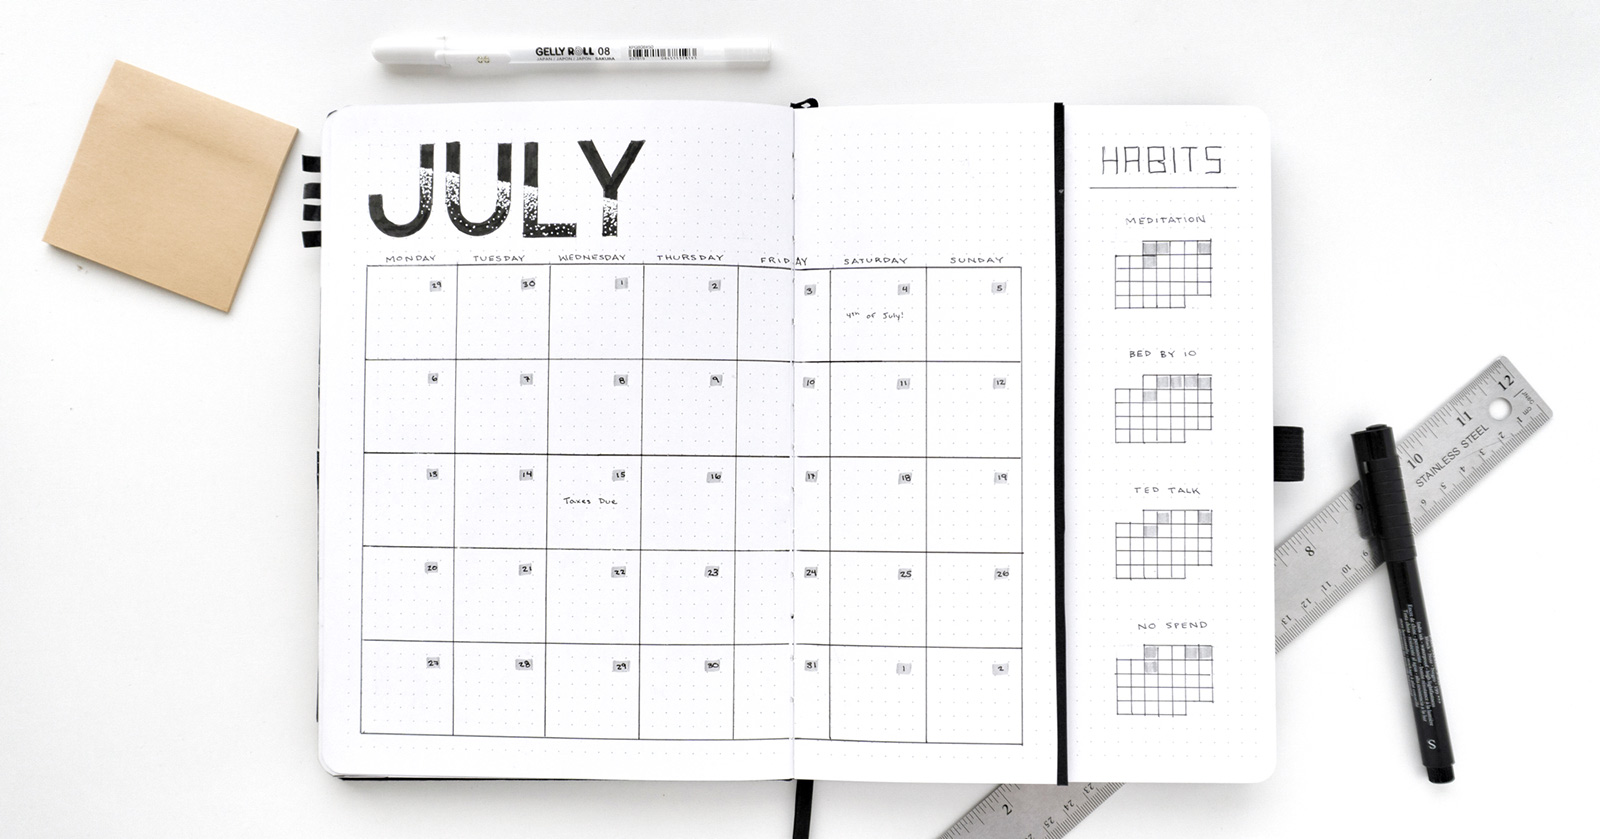
Continuing the monthly setup, I moved on to the calendar page. I chose to keep this month pretty simple, but added the dot theme to the word “July” in the upper left of the calendar.
I colored the letters with a Faber-Castell Soft Chisel pen and then added white dots on top with a Sakura Gelly Roll gel pen. To get the gradient effect, I drew a line across the letters and filled in with white dots under this line. The key to the gradient is more dots closer to the line and less dots as you get farther away.
I’m a huge fan of Dutch door layouts in my journal, and I used one in this spread to show my habit trackers. One of the great things about Dutch doors is that they allow you to see the content from multiple pages. In this case, I was opening the door (ha!) to tracking my habits from both the calendar and my goals spread.
Goals & Tasks
This spread has become one of the staples in my monthly bullet journal setup. The goals help to set the focus for the month ahead, and it is a great page to turn back to throughout the month. It serves as a sanity checking tool to ensure that the work I am doing is moving in the right direction.
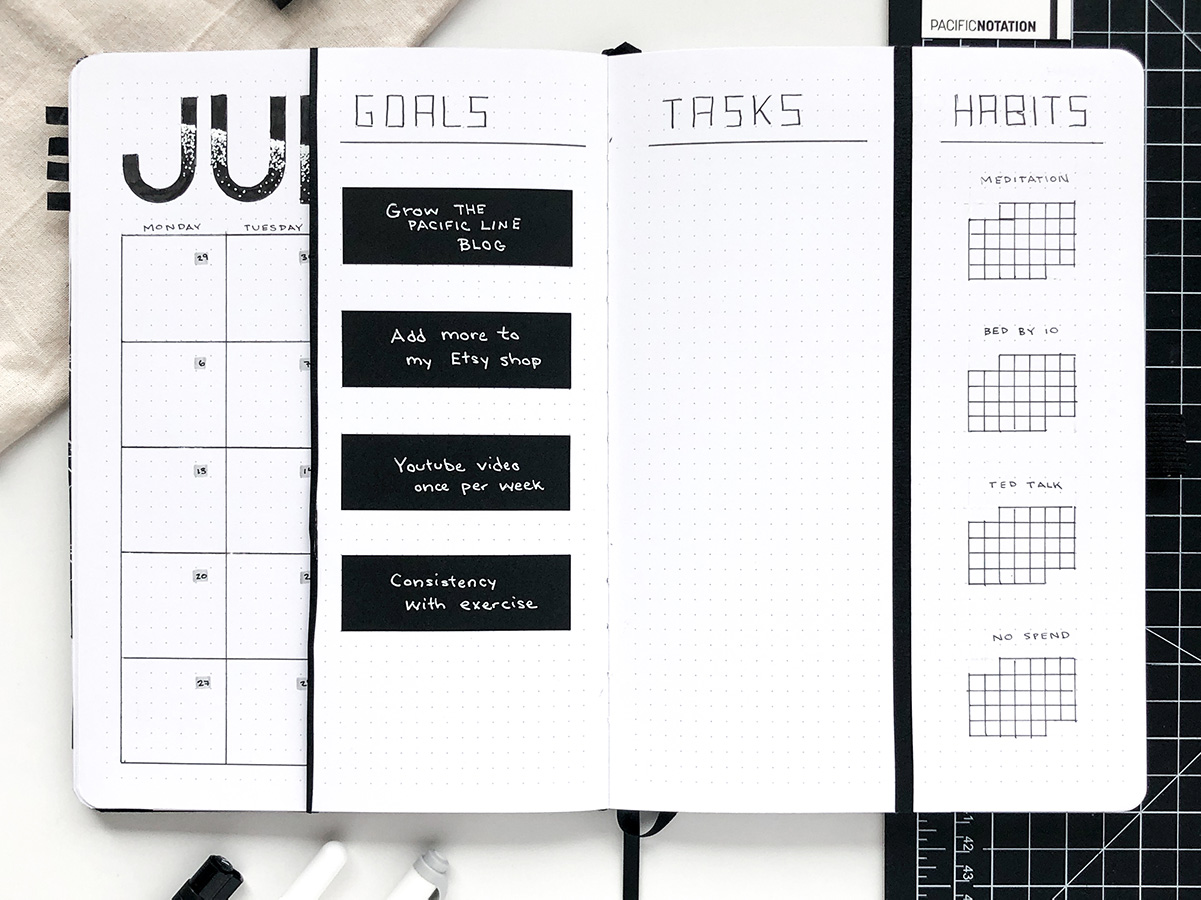
This month, I wrote my high level goals with a white gel pen on black sticky notes from Daiso. On the right side of the spread I created a column to write down any tasks that I want to get done during the month. Putting the tasks next to the goals helps me focus on tasks that will help achieve those goals.
The habit trackers are set up as simple calendars; one for each habit. Throughout the month, I will color in each day that I complete a habit with a grey Zebra mildliner pen.
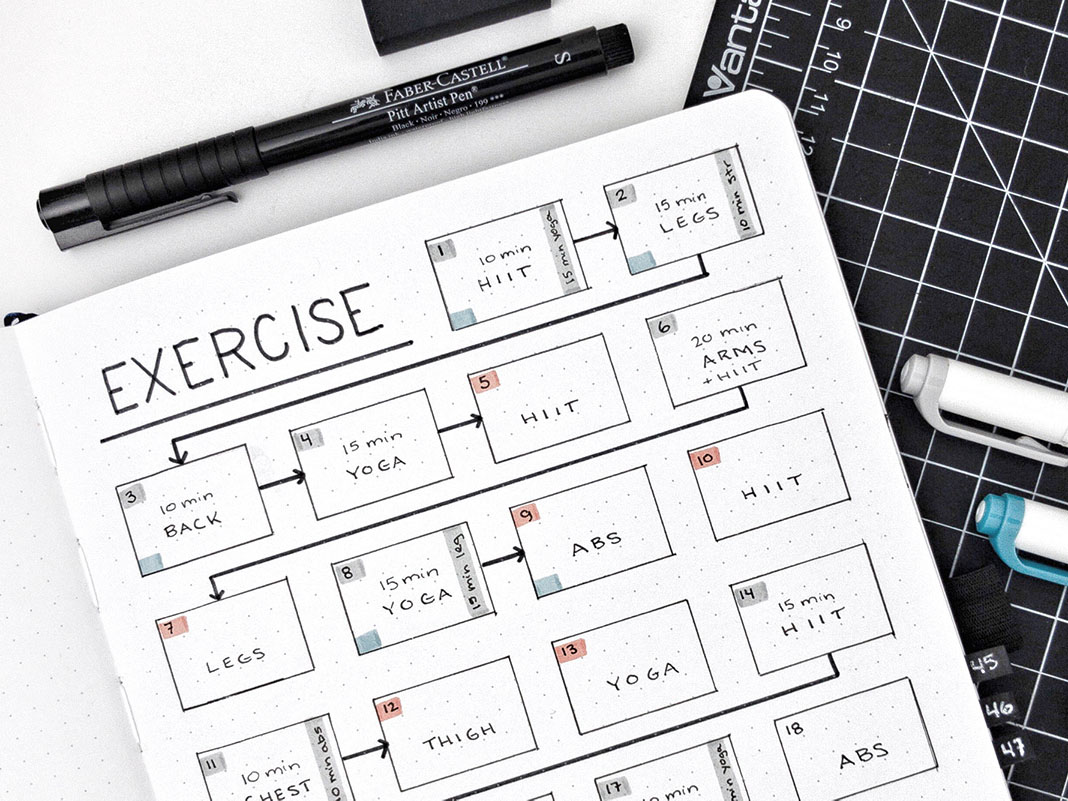
Exercise Tracker
I’m using a familiar setup for my exercise tracking this month. Check out this post for an overview of how I track my exercise! The main addition to this month’s exercise spread was a “Reward” at the top for some extra motivation.
![]()
To tie the spread into the rest of the theme, I added some dot gradient designs to the lower right. This design was quite simple to make with black sticky notes and white gel pen, but I love how it turned out. The end result reminds me of looking out through paneled windows to a sky of stars.
Social Media Planner
A new spread that I tried this month was a social media planner or “content” planner. This is a place to organize and plan out Instagram posts, YouTube videos, and blog ideas that I want to create. I got the idea from a couple of posts on Instagram: one by Cam (@_coffeeandsarcasm_) and one by Aska (@inprint.xyz)

For my setup, the left page is my Instagram planner with empty boxes to sketch post and spread ideas. Then on the right I have a similar YouTube planning section and two lists at the bottom to brainstorm ideas. I used a kraft paper sticky note and a kraft paper shipping label to make the backgrounds for these lists.
Final Thoughts
Thanks a lot for following along with my July monthly bullet journal setup! I hope you were able to find some inspiration, a new technique to try, or maybe a new spread idea. If you recreate or try anything from this post, I would love to see it, so be sure to tag me on Instagram @pacificnotation!
Supplies Used